Table of Contents
- 1. Why Horizontal Planting Enhances Tomato Growth
- 1.1. Overcoming the “Leggy” Seedling Problem
- 1.2. Maximizing Nutrient and Water Intake
- 2. Step-by-Step Guide to Planting Tomatoes Horizontally
- 2.1. Step 1: Prep the Seedling
- 2.2. Step 2: Dig a Shallow Trench
- 2.3. Step 3: Position the Plant
- 2.4. Step 4: Bury and Water Thoroughly
- 3. Essential Care Tips for a Bumper Crop
- 3.1. Nourish the Soil and Layer Mulch
- 3.2. Streamline Your Watering and Support Routine
- 3.3. Optimize Spacing for Airflow
- 4. Conclusion
- 5. Frequently Asked Questions (FAQ)
- 5.1. Can I use the sideways planting method for all tomato varieties?
- 5.2. Won’t the stem snap when I try to bend it upward?
- 5.3. Does this mean I don’t need to use a tomato cage or stake?
- 5.4. How deep should the horizontal trench be?
- 5.5. Should I fertilize right after planting them sideways?
The Secret Way to Plant Tomatoes Sideways for a Massive Harvest
Any seasoned gardener knows that tomato plants can be a bit demanding during their early stages. Dealing with weak stems, stunted root systems, and tall, “leggy” seedlings is a common frustration that often leads to a disappointing yield at the end of the season.
Fortunately, there is a simple, time-tested gardening secret that completely transforms how your plants grow: planting them horizontally. While burying a plant on its side might feel counterintuitive at first, this method capitalizes on a tomato’s unique biological superpowers to create an incredibly robust root system.

The Secret Way to Plant Tomatoes Sideways for a Massive Harvest
 Baking Soda Overuse Damages Houseplants
Why Horizontal Planting Enhances Tomato Growth
Unlike most garden vegetables, tomatoes possess the rare ability to sprout new roots all along their stems. Wherever the stem comes into direct contact with moist earth, it will begin to grow adventitious roots.
Overcoming the “Leggy” Seedling Problem
When indoor seedlings do not receive quite enough light, they stretch upward, becoming tall, thin, and spindly. If you plant a leggy tomato vertically, it often struggles to support its own weight, making it highly susceptible to snapping or falling over.
Laying that same elongated stem horizontally in a shallow trench turns a structural weakness into a massive advantage. Every single inch of the buried stem will transform into a root-producing powerhouse.

Maximizing Nutrient and Water Intake
A massive root system means your plant has a significantly larger surface area to absorb water and essential nutrients from the soil. This underground network fuels rapid top growth, thicker main stalks, and a much higher concentration of blossoms and fruit.
Furthermore, because these roots are spread out over a wider horizontal area closer to the surface, they can trap light rains more effectively and anchoring the plant securely against harsh winds and unexpected storms.
Step-by-Step Guide to Planting Tomatoes Horizontally
Implementing this technique is incredibly easy and requires no special tools. Follow these straightforward steps to set your crop up for success.

Step 1: Prep the Seedling
Select your tomato starter plant. If it looks a bit too tall or overgrown for its nursery pot, it is actually the perfect candidate for this method. Carefully snip off the lower sets of leaves, leaving only the top cluster of foliage intact. Removing these lower branches prevents them from rotting underground and tells the plant to focus its energy on root production.
Step 2: Dig a Shallow Trench
Instead of digging a traditional deep, vertical hole, dig a long, shallow trench about 4 to 6 inches deep. The length of the trench should match the length of the stripped tomato stem, plus the size of its original root ball.
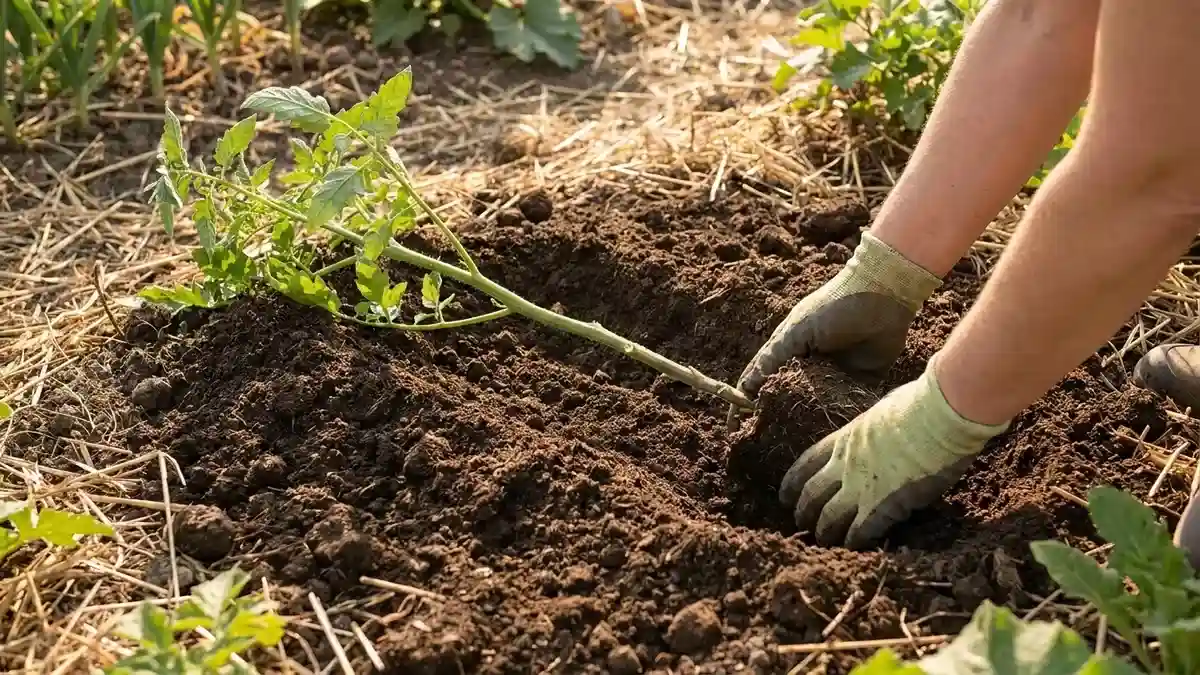
Step 3: Position the Plant
Place the root ball at one end of your trench. Gently lay the bare stem down along the bottom of the channel. Carefully tilt the leafy top of the plant upward so it points toward the sky. Do not worry about forcing a sharp bend—a gentle, natural slope is perfectly fine. Tomatoes are highly phototropic and will naturally straighten themselves out toward the sun within a few days.
Step 4: Bury and Water Thoroughly
Fill in the trench with loose soil, completely covering the stem and root ball while leaving only the top leafy tuft exposed above ground. Gently press the dirt down to eliminate empty air pockets, then give the area a deep, thorough watering to help the soil settle around the fresh roots.
Essential Care Tips for a Bumper Crop
While horizontal planting gives your tomatoes a massive head start, maintaining good gardening practices throughout the summer will maximize your final harvest.
Nourish the Soil and Layer Mulch
Tomatoes are incredibly heavy feeders. Mix a generous amount of organic compost or well-aged manure into your trench before planting to provide a steady stream of nutrients. Once planted, add a thick layer of straw or shredded wood mulch around the base. Mulching regulates soil temperature, stops weeds from stealing nutrients, and keeps moisture from evaporating too quickly.
Streamline Your Watering and Support Routine
Always water your plants deeply at the base rather than wetting the foliage from above. Keeping the leaves dry is one of the most effective ways to prevent fungal diseases like blight. Additionally, as the plant straightens out and surges upward, install a sturdy cage or stake early on to support the heavy clusters of fruit to come.
Optimize Spacing for Airflow
It can be tempting to crowd your garden bed to get as many plants in as possible, but tomatoes need their personal space. Leave roughly 2 to 3 feet between each plant. Proper spacing ensures that sunlight can reach the lower branches and allows air to circulate freely, keeping pests and diseases at bay.
Conclusion
Switching from traditional vertical planting to the horizontal trench method is a small adjustment that yields spectacular results. By working with the tomato’s natural biology, you eliminate the risks of spindly growth and build a resilient, high-yielding plant from the ground up. Expect to see thicker stalks, lush green foliage, and baskets piled high with juicy, homegrown tomatoes come harvest time.
Frequently Asked Questions (FAQ)
Can I use the sideways planting method for all tomato varieties?
Yes! This technique works beautifully for both determinate (bush) and indeterminate (vining) tomato varieties. It is universally beneficial because all tomato stems share the same biological ability to grow roots when buried.
Won’t the stem snap when I try to bend it upward?
Tomato stems are surprisingly flexible, especially when young. As long as you create a gradual, gentle slope rather than a harsh 90-degree bend, the stem will not break. Even if it stays slightly crooked initially, the plant will naturally correct itself and grow straight up toward the sun within 48 hours.
Does this mean I don’t need to use a tomato cage or stake?
You will still definitely need structural support later on. While this method creates a much stronger, more stable root system that keeps the plant anchored, the top growth will still become top-heavy with foliage and fruit as the season progresses.
How deep should the horizontal trench be?
Keep the trench relatively shallow—ideally between 4 and 6 inches deep. The top layers of soil are the warmest and contain the highest concentration of beneficial microbial activity and oxygen, which encourages faster root development than deep, cold earth.
Should I fertilize right after planting them sideways?
It is best to mix compost into the surrounding soil at planting time rather than applying heavy synthetic fertilizers right away. Let the buried stem spend the first week focusing on establishing its new root system before introducing concentrated fertilizers.