Table of Contents
- 1. 1. Keep the Plant Slightly Root-Bound
- 2. 2. Upgrade to Bright, Indirect Sunlight
- 3. 3. Master the “Soak and Dry” Watering Balance
- 4. 4. Implement a Seasonal Micro-Dose Feeding Routine
- 5. 5. Switch to a High-Drainage Custom Soil Mix
- 6. 6. Leave Fading Stems on the Plant
- 7. 7. Leverage the Natural “Drought Shock” Stimulus
- 8. Cultivating Patience for a Fuller Canopy
- 9. Frequently Asked Questions
- 9.1. Why are the new shoots on my ZZ plant a much lighter green than the old ones?
- 9.2. Can I multiply a ZZ plant by planting a single leaf directly in the pot?
- 9.3. What causes a ZZ stem to suddenly fall over or break at the base?
- 9.4. Should I mist my ZZ plant to help it grow more stems?
- 9.5. How do I know if my ZZ plant is ready for a bigger pot?
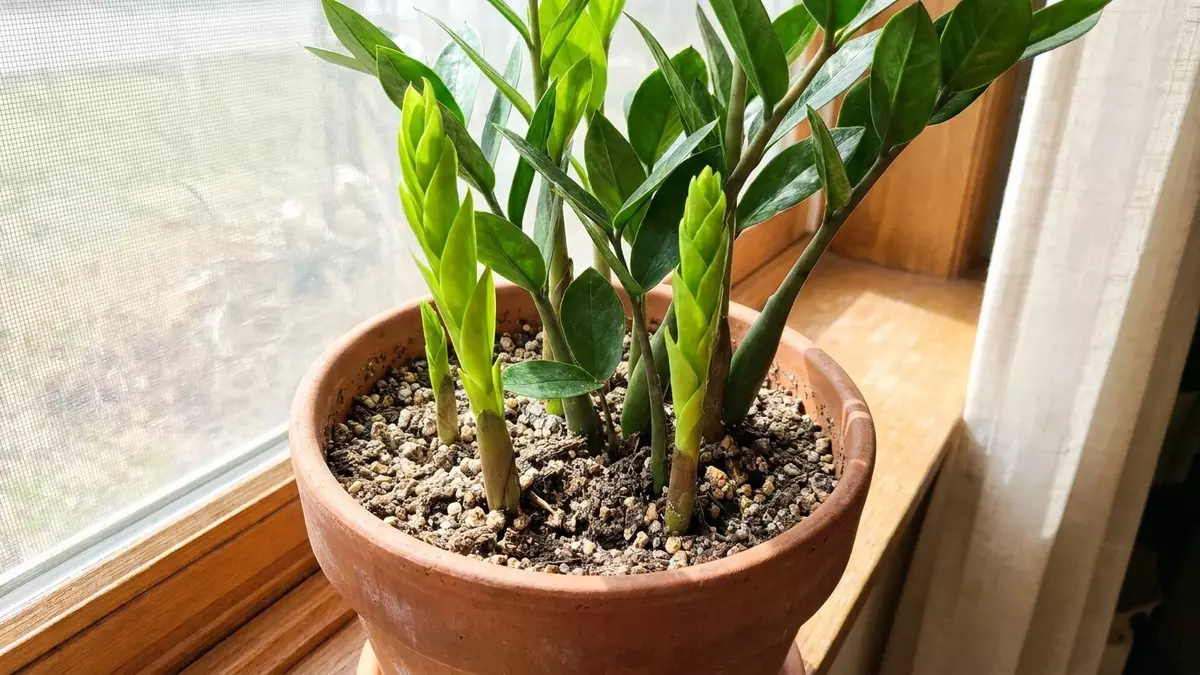
7 Tips to Make Your ZZ Plant Multiply in the Same Pot
The ZZ plant (Zamioculcas zamiifolia) has earned a legendary reputation as one of the most indestructible houseplants in the world. It is the ultimate low-maintenance companion—it tolerates dim corners, forgives weeks of forgotten waterings, and shrugs off dry indoor air.
However, there is a major difference between a ZZ plant that is merely surviving and one that is actively thriving. If your plant has sat in the same corner for months without pushing out a single new leaf, it isn’t broken—it’s just resting.
To transform a sparse, leggy specimen into a lush, dense, and dramatic centerpiece, you need to understand how the plant grows. ZZ plants spread via underground rhizomes—thick, potato-like underground stems that store water and nutrients. Every elegant frond you see above the soil line originates from these subterranean powerhouses. By optimizing conditions for the root system, you can encourage your ZZ plant to multiply and fill out its current pot.
7 Tips to Make Your ZZ Plant Multiply in the Same Pot
1. Keep the Plant Slightly Root-Bound
While many tropical houseplants require frequent repotting to stretch their roots, ZZ plants prefer tight, cozy quarters. Keeping a ZZ plant slightly snug in its container is one of the fastest ways to stimulate new top growth.
When you place a ZZ plant in a massive pot filled with empty soil, the plant directs all its metabolic energy downward to expand its root network and fill the void. Conversely, when the roots and rhizomes feel a bit of pressure from the container walls, the plant shifts its focus. Instead of growing more roots, the clustered rhizomes begin sending up a flush of new vertical shoots to fill the pot’s surface area.
The Golden Pot Rule: When you eventually do step up a pot size, choose a container that is only 1 to 2 inches wider than the existing root ball. Opt for a heavy ceramic or terra cotta pot, as expanding ZZ rhizomes are incredibly strong and have been known to literally crack or warp cheap plastic pots when they run out of space.

2. Upgrade to Bright, Indirect Sunlight
The ZZ plant is famous for its ability to survive in windowless offices and dark hallways. But make no mistake: low light does not equal optimal growth. In a dim room, the plant enters a state of conservation, holding onto its existing leaves but refusing to spend energy on reproduction.
If you want your plant to multiply, light is your primary fuel source. Move your container to a spot that receives plenty of bright, indirect sunlight.
+--------------------------------------------------------------------------+
|                        ZZ PLANT LIGHTING COMPASS                         |
+-------------------+------------------------------------------------------+
| East-Facing       | Ideal: Provides gentle morning sun without midday    |
| Window            | heat.                                                |
+-------------------+------------------------------------------------------+
| South or West     | Great, but use a sheer curtain to filter the intense |
| Facing Window     | afternoon rays and protect leaves from scorching.    |
|                   |                                                      |
+-------------------+------------------------------------------------------+
| North-Facing      | Tolerable for survival, but usually too dim to spark |
| Window            | rapid multiplication.                                |
+-------------------+------------------------------------------------------+
3. Master the “Soak and Dry” Watering Balance
Because the rhizomes and thick petioles (stems) of a ZZ plant are structurally designed to store massive reservoirs of water, the plant is highly susceptible to overwatering. Constantly saturated soil starves the roots of oxygen, leading to rhizome rot—a death sentence for the plant.

To encourage multiplication, you must maintain a healthy wet-to-dry cycle that keeps the rhizomes plump without suffocating them. Use the soak and dry method:
Never water on a strict calendar schedule. Always push your finger 2 to 3 inches deep into the soil mix, or use a wooden chopstick to test for moisture.
If the soil feels damp, walk away. Wait until the substrate is 100% dry all the way to the bottom of the pot.
When it is time to water, drench the soil thoroughly until water flows freely out of the container’s bottom drainage holes. This ensures every subterranean rhizome receives a deep drink.
Empty the drainage saucer after 15 minutes so the pot never sits in stagnant water.
4. Implement a Seasonal Micro-Dose Feeding Routine
ZZ plants are not greedy feeders, but a modest infusion of nutrients during their active growing phase can trigger a surge of new shoots.
During the spring and summer months, feed your plant once a month with a balanced, water-soluble houseplant fertilizer (such as a 10-10-10 NPK formula). The trick is to dilute the fertilizer to half or even a quarter of the manufacturer’s recommended strength. A gentle, diluted dose provides the essential nitrogen and potassium needed to build new tissue without overwhelming or burning the sensitive underground root tips. As autumn approaches and the plant’s growth naturally slows, cease all fertilization entirely until the following spring.
5. Switch to a High-Drainage Custom Soil Mix
To get your rhizomes expanding and multiplying comfortably, they need a light, airy, and well-oxygenated home. Standard, dense potting soils trap too much moisture and compress tightly around the roots over time, halting new growth.
Upgrade your plant’s environment by creating a highly porous, custom soil blend. A perfect recipe for a multiplying ZZ plant includes:
60% High-quality standard potting soil (as a nutrient base)
20% Perlite or pumice (to create critical air pockets and speed up drainage)
20% Coarse sand or orchid bark (to mimic the rocky, gritty soils of their native African habitat)
This chunkier texture allows water to rush through smoothly, ensuring the roots can breathe easily and expand across the container without restriction.
6. Leave Fading Stems on the Plant
When an older stem begins to lose its vibrant gloss, turns a pale yellow, or looks slightly tattered, your first instinct might be to reach for the pruning shears. However, cutting a fading stem too early can cheat the plant out of vital energy.
As a ZZ leaf matures and nears the end of its natural life cycle, the plant begins a process called senescence. It systematically draws all the remaining sugars, moisture, and starches out of that old frond and funnels them back down into the underground rhizomes.
Allow this process to finish naturally. Wait until the old stem is completely dry, brown, and paper-thin before snipping it off at the soil line. That extra blast of recycled energy is often exactly what the rhizome needs to trigger the development of a brand-new underground bud.
7. Leverage the Natural “Drought Shock” Stimulus
If your ZZ plant has perfect light, soil, and fertilizer but still refuses to multiply, you can try an advanced horticultural trick: simulated seasonal stress.
In their native habitats across Eastern Africa, ZZ plants are dictated by extreme weather patterns, oscillating between prolonged periods of intense drought and sudden, heavy monsoon rains. You can mimic this cycle to shock a stubborn plant out of dormancy:
+--------------------------------------------------------------------------+
|                  THE SIMULATED DROUGHT TRIGGER PROTOCOL                  |
+--------------------------------------------------------------------------+
| 1. Prolong the Dry Phase: Intentionally withhold water for an extra      |
|    2 to 3 weeks past the point where the soil has gone completely dry.   |
|                                                                          |
| 2. Monitor the Plant: The stems may slightly droop or wrinkle, signaling |
|    the plant has entered a defensive survival mode.                      |
|                                                                          |
| 3. Execute the Flush: Deliver a massive, thorough watering, drenching    |
|    the pot entirely.                                                     |
+--------------------------------------------------------------------------+
This sudden transition from scarcity to abundance mimics the arrival of the spring rains. Sensing that conditions are optimal for reproduction, the rehydrated rhizomes will often “wake up” and quickly push multiple bright green, cone-shaped spears up through the soil surface.
Cultivating Patience for a Fuller Canopy
Ultimately, the most important tool in your plant care toolkit is patience. ZZ plants operate on a remarkably slow internal clock; even under flawless museum-grade greenhouse conditions, a mature specimen may only produce a handful of new fronds each year.
Avoid the temptation to constantly fuss with, move, or over-meddle with your plant. By maintaining a steady baseline of bright indirect light, allowing the soil to dry out completely, and feeding gently in the summer, you create a stable environment. Over time, those small, tightly wrapped green spikes will inevitably break through the soil, slowly unfurling into the rich, glossy, and architectural canopy you’ve been waiting for.
Frequently Asked Questions
Why are the new shoots on my ZZ plant a much lighter green than the old ones?
Do not worry—this is completely normal. Brand new ZZ plant fronds emerge from the soil as a bright, almost neon lime-green color. They are incredibly soft and flexible at this stage. Over the course of a few weeks, as the foliage matures and accumulates chlorophyll, the leaves will harden, stiffen, and darken to match the deep, glossy emerald hue of the older stalks.
Can I multiply a ZZ plant by planting a single leaf directly in the pot?
Yes, you can! ZZ plants possess an amazing ability to regenerate from a single detached leaf leaflet. If you tuck a healthy leaf blade shallowly into the soil mix, it will slowly form a tiny, independent underground rhizome over several months, which will eventually send up its own new stems. However, this method requires extreme patience, as it can take up to a full year just to see the first tiny shoot appear.
What causes a ZZ stem to suddenly fall over or break at the base?
This is almost always a classic symptom of overwatering and root rot. When the soil stays damp for too long, the underground base of the stem mushifies and loses its structural integrity, causing the heavy frond to collapse under its own weight. If this happens, pull the plant from the pot immediately, trim away any black or slimy rhizomes, and repot the healthy portions into fresh, dry soil.
Should I mist my ZZ plant to help it grow more stems?
No, misting is completely unnecessary and can actually do more harm than good. ZZ plants are native to arid environments and thrive in standard, low-humidity household air. Misting creates a film of water on the tightly packed leaflets, which can invite fungal diseases like powdery mildew or leaf spot rot rather than encouraging new growth.
How do I know if my ZZ plant is ready for a bigger pot?
Look for physical signs of extreme crowding. If you notice the thick underground rhizomes pushing themselves completely up out of the topsoil, if water runs straight through the pot without being absorbed, or if you see the sides of a plastic nursery pot physically bulging and distorting, the root system has completely filled the space. This is your cue to upgrade to a container that is one size larger.