Table of Contents
**Sterilize Potting Soil: Stop Damping-Off and Boost Seedling Success**
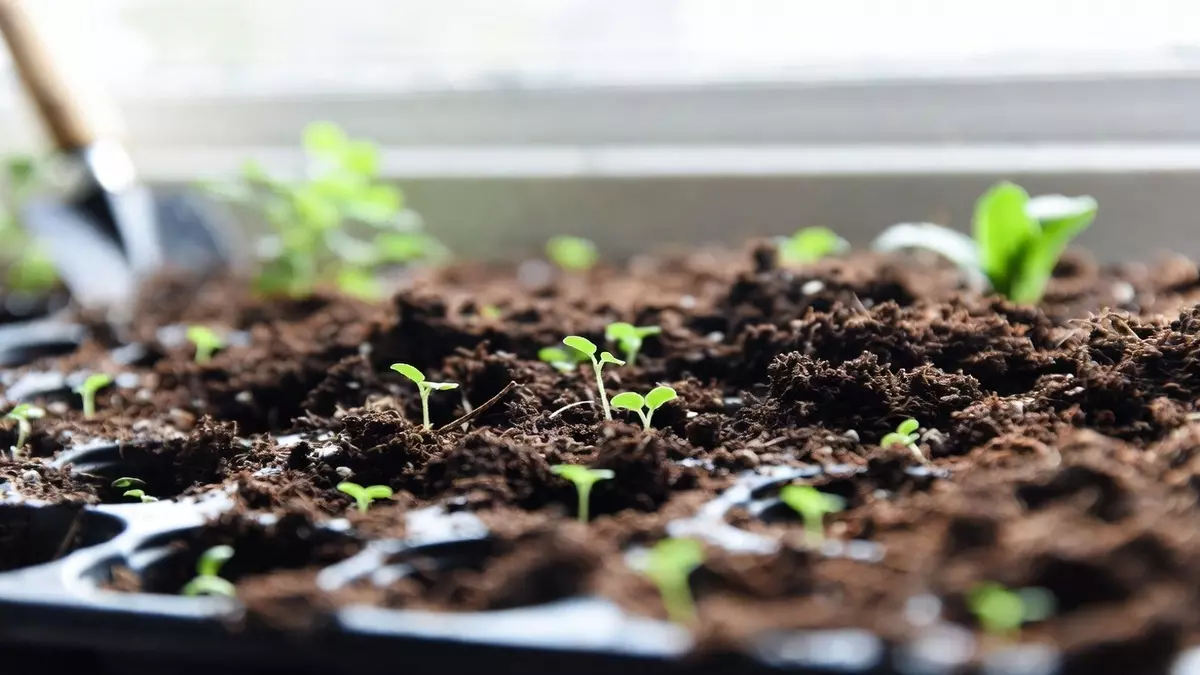
Healthy potting soil forms the foundation for thriving plants, strong roots, and fewer issues down the line. Yet hidden problems like fungal spores, gnat larvae, and pathogens often lurk in both new and reused mixes. These unseen threats can quickly destroy seedlings through damping-off disease or ongoing pest battles.
Sterilizing potting soil offers a straightforward solution that many indoor gardeners and seed starters rely on. This process eliminates harmful organisms while giving your plants the clean start they need to grow vigorously. In this comprehensive guide, you’ll discover why sterilization matters, the ideal temperature to use, four proven methods, and practical tips to restore beneficial life afterward.
Whether you’re starting vegetables indoors, propagating houseplants, or reusing last season’s container mix, proper soil sterilization can dramatically improve your success rate.

Sterilize Potting Soil Stop Damping-Off and Boost Seedling Success
### Why Sterilizing Potting Soil Makes a Big Difference
Potting mixes often sit in warehouses or garden centers for weeks or months before reaching your hands. During that time, moisture and warmth create perfect conditions for fungi, mold, and insect eggs to develop. Even premium commercial bags can harbor problems once opened and exposed to home environments.

Gardeners who reuse soil face even greater risks. Old mixes frequently contain decaying roots, leftover pest eggs, and disease spores from previous seasons. Without treatment, these issues multiply rapidly in warm, moist seedling trays.
**Key Benefits Include:**
– Reduced damping-off disease that kills young seedlings
– Fewer fungus gnats and other flying pests
– Better germination rates for delicate seeds
– Healthier root development in early growth stages
– More predictable results when starting plants indoors
Sterilization doesn’t need to be complicated or expensive. With basic kitchen tools or sunlight, you can create a safer growing medium that supports strong, resilient plants.
### The Right Temperature for Effective Soil Sterilization
Most experts recommend heating soil to around 180°F (82°C) for 30 minutes. This temperature effectively kills harmful pathogens, weed seeds, and insect larvae without destroying the soil’s overall structure.
Exceeding 200°F (93°C) can cause problems like a burnt odor, reduced nutrient availability, and damage to organic components. Gentle, consistent heating always produces better long-term results for young plants.
### 4 Proven Methods to Sterilize Potting Soil
#### 1. Oven Sterilization (Best for Medium Batches)
The oven method provides reliable, even heat distribution and works well for most home gardeners.
**How to Do It:**
– Slightly moisten the soil so it feels damp but not soggy (this helps heat penetrate evenly).
– Spread the mix in a shallow baking tray or oven-safe dish, no more than 4 inches deep.
– Cover tightly with aluminum foil to trap steam and moisture.
– Preheat your oven to 180–200°F (82–93°C).
– Bake for 30 minutes once the center reaches the target temperature (use a meat thermometer to check).
– Turn off the oven and allow the soil to cool completely with the foil still in place.
This method works excellently for seed-starting mixes and small reuse projects. Avoid higher temperatures that could degrade organic matter.
#### 2. Microwave Sterilization (Ideal for Small Quantities)
For quick treatment of small amounts used in seed trays or individual pots, the microwave offers fast results.
**How to Do It:**
– Place moist soil in a microwave-safe container with a vented lid.
– Heat on high for 2–3 minutes per 2 pounds of soil, stirring halfway through.
– Check the internal temperature reaches at least 180°F.
– Let the covered container rest for 5–10 minutes so residual heat continues working.
– Cool completely before using.
This approach is perfect for apartment dwellers or when you only need a small amount of sterilized mix. Always use caution with hot containers.
#### 3. Solarization (Great for Warm Climates and Large Volumes)
Solarization uses the power of the sun — no electricity required. It works best in sunny, warm regions during summer.
**How to Do It:**
– Moisten the soil and place it in clear plastic bags or spread it under clear plastic sheeting.
– Seal the bags or edges tightly to trap heat.
– Place in a sunny location for 4–6 weeks, turning occasionally for even exposure.
– Monitor internal temperatures (they can exceed 140°F on hot days).
– Once complete, let the soil cool and store properly.
This no-cost method preserves soil structure well and suits gardeners with larger volumes or limited kitchen space.
#### 4. Steam Sterilization (Effective for Bigger Batches)
Steaming provides deep, uniform heat penetration ideal for larger quantities.
**How to Do It:**
– Add a small amount of water to a large pot and place a heat-safe basket or colander filled with soil above the water line.
– Cover and bring water to a boil, then reduce to maintain steady steam.
– Steam for 30 minutes after the soil reaches 180°F.
– Allow everything to cool slowly with the lid on.
Many gardeners use a dedicated soil steamer or improvise with kitchen equipment for this method.
### Essential Tips for Successful Soil Sterilization
**Moisture Level Matters**
Slightly damp soil conducts heat more evenly than completely dry mix. Too much water, however, can create heavy, compacted results after cooling.
**Post-Sterilization Handling**
Store cooled soil in sealed containers or heavy-duty bags to prevent recontamination from airborne spores. Label with the date for easy rotation.
**Restoring Beneficial Life**
Sterilization eliminates both bad and good organisms. After cooling, many gardeners amend the soil with:
– Mature compost (10–20% by volume)
– Worm castings for natural nutrients
– Mycorrhizal inoculants to rebuild root support
– Beneficial bacteria products for long-term soil health
This step transforms sterile soil into a living, vibrant growing medium.
**When to Sterilize**
Focus on sterilization when starting delicate seeds, dealing with recurring gnat issues, or reusing old container soil. Fresh, sealed commercial mixes often don’t require treatment unless problems appear.
### Common Mistakes to Avoid
– Overheating the soil beyond 200°F
– Using bone-dry soil that heats unevenly
– Leaving sterilized soil uncovered for long periods
– Adding amendments before the soil fully cools
– Reusing dirty trays or tools that reintroduce pathogens
Taking time with each step ensures the best outcome for your plants.
### Creative Ways to Use Sterilized Soil
– Seed starting trays for vegetables and flowers
– Potting up houseplant cuttings and divisions
– Revitalizing tired container gardens
– Creating custom mixes for succulents or acid-loving plants
– Filling raised beds for early spring starts
Sterilized soil gives every project a cleaner foundation for success.
### Long-Term Advantages for Your Garden
Regular soil sterilization leads to stronger seedlings, fewer disease outbreaks, and more consistent growing seasons. Many indoor gardeners notice dramatic improvements in germination rates and overall plant vigor after adopting this practice.
Combined with good cultural habits — proper watering, adequate light, and appropriate fertilization — sterilized soil helps create resilient plants that better withstand environmental stress.
### Conclusion
Sterilizing potting soil represents one of the smartest preventive steps any plant lover can take. By removing hidden threats like fungi, pests, and pathogens, you set the stage for healthier roots and more successful growing experiences. Whether using your oven, microwave, sun, or steam, the process is straightforward and highly effective when done correctly.
Start with a small batch to build confidence, then incorporate sterilization into your regular seed-starting and soil-reuse routine. Your seedlings will thank you with stronger growth and fewer setbacks. A little preparation now leads to much greener results later.
Embrace this simple technique and enjoy more reliable, thriving plants season after season.
### Frequently Asked Questions
**Do I need to sterilize brand new potting soil from the store?**
Not usually. Most commercial mixes are relatively clean if the bag remained sealed. Sterilize when you notice fungus gnats, mold, or plan to start very sensitive seeds indoors.
**Does sterilizing soil remove all beneficial microbes?**
Yes, it kills both harmful and helpful organisms. Reintroduce good microbes afterward by mixing in compost, worm castings, or mycorrhizal products once the soil cools completely.
**Can I sterilize soil using boiling water?**
Boiling water is not reliable. It rarely heats the center of the mix sufficiently. Steam or oven methods work far better for consistent results.
**How long can I store sterilized potting soil?**
Properly cooled and sealed soil can last 6–12 months in a dry, cool location. Always check for moisture or off odors before using stored mix.
**Will sterilization change the nutrient content of my soil?**
Mild heating at 180°F has minimal impact on nutrients. Avoid high temperatures that can degrade organic matter and create unwanted compounds.
**Is solarization effective in cooler climates?**
It works more slowly and may require longer periods (6–8 weeks) with consistent sunlight. Combining it with black plastic underneath can help boost temperatures.
**Can I sterilize soil with kids or pets around?**
Yes, but use caution with hot methods. Oven and microwave approaches require adult supervision. Solarization is the safest for family environments.