Table of Contents
- 1. What Is Bone Meal Fertilizer and Why Does Your Soil Need It?
- 1.1. The Power of Phosphorus and Calcium
- 1.2. Soil pH and Nutrient Availability
- 2. Step-by-Step Guide to Making Bone Meal at Home
- 2.1. Essential Materials Needed
- 2.2. Step 1: Clean and Prepare the Bones
- 2.3. Step 2: Dehydrate Until Brittle
- 2.4. Step 3: Crush and Pulverize Into Powder
- 2.5. Step 4: Storage and Preservation
- 3. How to Apply Homemade Bone Meal in the Garden
- 3.1. Timing Your Applications
- 4. Crucial Considerations for Using Bone Meal Safely
- 4.1. Supplementing a Balanced Diet
- 4.2. Managing Curious Wildlife
- 5. Frequently Asked Questions
- 5.1. Can I use cooked bones from my dinner plate to make fertilizer?
- 5.2. Will bone meal burn my plant roots if I apply too much?
- 5.3. How long does it take for homemade bone meal to start working?
- 5.4. Is bone meal safe to use around household pets?
- 5.5. Can I apply bone meal to potted indoor house plants?
DIY Bone Meal Fertilizer: Transform Your Kitchen Scraps Into Soil Gold
If you have ever stood over your kitchen trash can with a pile of leftover dinner bones, you have probably wondered if there is a better way to handle organic waste. Instead of tossing those scraps into the garbage, you can actually transform them into a potent, nutrient-dense elixir for your garden.
Repurposing kitchen leftovers into homemade bone meal is a sustainable, budget-friendly gardening practice that gives a second life to ordinary food waste. This slow-release organic amendment acts as a quiet powerhouse underneath the soil, encouraging deep root networks and vibrant, heavy blossoms. If you are committed to organic gardening or simply looking to cut down on commercial fertilizer costs, learning how to craft your own bone meal is one of the most rewarding skills you can add to your homesteading toolkit.
![]()
DIY Bone Meal Fertilizer Transform Your Kitchen Scraps Into Soil Gold
What Is Bone Meal Fertilizer and Why Does Your Soil Need It?
Bone meal is a finely ground powder created from cleaned, dried, and pulverized animal bones. In commercial settings, it is typically derived from cattle, but home gardeners can easily utilize a mix of beef, pork, and chicken bones.
When added to the garden, bone meal acts as a targeted supplement that fills major nutritional gaps in the soil, focusing primarily on two essential macronutrients.
The Power of Phosphorus and Calcium
Unlike standard synthetic fertilizers that flood the soil with nitrogen, bone meal provides an concentrated dose of alternative essential elements:
Phosphorus (Typically 12–16%): This element is absolutely vital for the early stages of plant development. It stimulates rapid root growth, triggers abundant flower budding, and enhances fruit production.
Calcium (Typically 20–30%): Calcium functions as a structural building block, strengthening plant cell walls. Adequate calcium levels are crucial for preventing devastating structural issues like blossom-end rot, which frequently plagues tomatoes, peppers, and squash.
Soil pH and Nutrient Availability
To get the most out of your homemade amendment, soil chemistry matters. Agricultural extension research shows that bone meal is highly effective in acidic soils with a pH below 7. In these environments, the acidic soil chemistry naturally breaks down the powder, making the phosphorus and calcium readily available for plant roots to drink up.
Step-by-Step Guide to Making Bone Meal at Home
Creating your own organic fertilizer requires minimal equipment, though it does demand a bit of patience. By carefully processing the scraps, you eliminate pathogens and make the tough structures brittle enough to grind.
Essential Materials Needed
Before beginning, gather the following kitchen and gardening tools:
Leftover animal bones (chicken, pork, or beef; choose leaner cuts to minimize excess grease)
A large stock pot or Dutch oven
An oven or a heavy-duty food dehydrator
A rimmed baking sheet
A hammer, mallet, or cast-iron mortar and pestle
A high-powered blender or industrial-grade food processor
An airtight storage jar or container
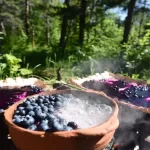
Step 1: Clean and Prepare the Bones
Any remaining meat, fat, or marrow will rot and create foul odors in your garden, potentially attracting pests. Place your collected bones into a large stock pot, cover them fully with water, and bring to a rolling boil. Let them boil for 1 to 2 hours to strip away all tissues.
Pro Tip: For stubborn bones, add a splash of white vinegar to the boiling water. The mild acid helps strip away residual fat and slightly softens the outer structure for easier crushing later on.
Step 2: Dehydrate Until Brittle
Once completely clean, spread the bones across a rimmed baking tray. Preheat your oven to 250°F (120°C) and bake the bones for 3 to 4 hours. You will know they are ready when they lose their glossy appearance, turn chalky white or tan, and snap easily when bent. Removing every trace of moisture is critical for a successful grind.
Step 3: Crush and Pulverize Into Powder
Place the brittle bones inside a heavy canvas bag or wrap them in a clean towel. Use a hammer or mallet to smash them into small, pebble-sized chunks. Next, transfer the small fragments into a high-powered blender or a heavy-duty food processor. Pulse the machine until the fragments transform into a fine, uniform powder. Sift out any larger, stubborn pieces and regrind them.
Step 4: Storage and Preservation
Pour your freshly made bone meal into a clean, airtight glass jar or plastic container. Store it in a cool, dark, and dry closet or pantry. Kept away from humidity and moisture, your homemade organic fertilizer will remain stable and effective for several months.
How to Apply Homemade Bone Meal in the Garden
Because bone meal breaks down slowly over time, application methods depend entirely on what you are growing and when you apply it.
| Plant Type / Area | Recommended Dosage | Application Method |
| New Seedlings & Bulbs | 1 tablespoon per hole | Mix directly into the bottom of the planting hole, covering lightly with a layer of soil before inserting the plant. |
| Established Garden Beds | 10 pounds per 100 sq. feet | Scatter evenly across the surface and gently rake it into the top two inches of topsoil. |
| Fruit Trees & Large Shrubs | 1 cup per tree/shrub | Scatter in a wide circle around the drip line of the branches; avoid placing it directly against the trunk. |
Timing Your Applications
For the absolute best results, incorporate bone meal into your gardening routine during two specific windows:
Early Spring: Apply as perennial plants, roses, and shrubs wake up from winter dormancy and require immediate root support for the upcoming growing season.
Late Fall: Amend your beds in autumn to give the soil microbes plenty of time to break down the minerals, ensuring a nutrient-rich environment by the time spring planting arrives.
Crucial Considerations for Using Bone Meal Safely
While bone meal is an exceptional organic amendment, it is not a cure-all solution for every garden ailment. Keeping a few strategic limitations in mind will prevent common gardening mishaps.
Supplementing a Balanced Diet
Bone meal is not a complete, balanced fertilizer. It lacks nitrogen and potassium—the elements responsible for lush green leaves and overall plant disease resistance. If you are growing heavy-feeding leafy greens or maintaining a lawn, you will need to supplement your bone meal with other organic materials, such as compost or liquid kelp, to provide a well-rounded nutritional profile.
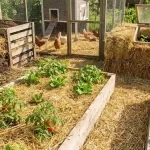
Managing Curious Wildlife
The natural, rich scent of homemade bone meal is highly attractive to domestic dogs, cats, and wild woodland creatures like raccoons, opossums, and rodents. If left exposed on the soil surface, animals may dig up your precious seedlings looking for a buried treat. Always mix the powder thoroughly into the soil and cover the area with a thick layer of wood mulch or straw to mask the aroma.
Frequently Asked Questions
Can I use cooked bones from my dinner plate to make fertilizer?
Yes, absolutely. Leftover bones from roasted chickens, barbecued ribs, or T-bone steaks are perfect for making bone meal. Just ensure you boil them thoroughly to strip away any sauces, salt, seasonings, and residual fats before drying them in the oven.
Will bone meal burn my plant roots if I apply too much?
Because bone meal is an organic, slow-release fertilizer, it is highly unlikely to cause chemical root burn the way synthetic fertilizers do. However, over-applying it can lead to an excess of phosphorus in the soil, which can lock out other essential micronutrients like iron and zinc. Always stick to recommended application rates.
How long does it take for homemade bone meal to start working?
Bone meal is a slow-release amendment that relies on soil microbes and moisture to break down. It typically takes anywhere from two to four months to become fully bioavailable to your plants. This is why late fall or early spring applications are ideal.
Is bone meal safe to use around household pets?
Ingesting large quantities of bone meal can form a thick, cement-like ball in an animal’s stomach, leading to severe gastrointestinal blockages. Always mix the powder deeply into the soil, water the area thoroughly, and cover it with mulch to prevent dogs or outdoor cats from licking or digging up the freshly amended earth.
Can I apply bone meal to potted indoor house plants?
Yes, you can use bone meal for houseplants, particularly flowering varieties like African violets or peace lilies. Scratch a teaspoon of the powder into the potting mix once or twice a year. Keep in mind that because indoor potting soil lacks the robust microbial life found in outdoor ground soil, the breakdown process will be significantly slower.