
Table of Contents
- 1. Why Switching to Eco-Friendly Weed Control Matters
- 2. The Magic Trio: Vinegar, Salt, and Soap
- 2.1. How the Ingredients Work Together
- 3. The Ultimate DIY Weed Killer Recipe
- 3.1. What You Will Need:
- 3.2. Step-by-Step Mixing Instructions:
- 4. Application Tactics for Complete Eradication
- 4.1. Timing is Everything
- 4.2. Target with Precision
- 4.3. Focus on Vulnerable Growth
- 5. Ideal Locations for Using Natural Sprays
- 6. A Holistic Approach: Additional Preventative Defenses
- 6.1. Deploy Thick Mulch Barriers
- 6.2. The Boiling Water Technique
- 6.3. Smart Hand-Pulling Habits
- 6.4. Apply Corn Gluten Meal
- 7. Conclusion
- 8. Frequently Asked Questions
- 8.1. Will this vinegar spray ruin the quality of my garden soil permanently?
- 8.2. Can I use regular 5% apple cider vinegar instead of white vinegar?
- 8.3. Is this homemade weed killer safe to use around outdoor pets?
- 8.4. How long does it take for the weeds to die after spraying them?
- 8.5. Can I use this mixture to eliminate weeds growing in my lawn?
3 Easy Homemade DIY Weed Killer Recipes That Work Fast
Few things are more frustrating for a homeowner than spending a beautiful Saturday afternoon pulling weeds, only to see those identical stubborn green invaders pop right back up a few days later. Weeds possess an astonishing amount of resilience. They seemingly thrive on neglect, aggressively invading the pristine gaps between your patio pavers, overtaking well-manicured garden beds, and aggressively bursting through the smallest fractures in your concrete driveway.
If you are tired of the endless cycle of manual weeding, you might be tempted to reach for a commercial chemical spray. However, you do not need a garage stocked with toxic chemical herbicides to reclaim your outdoor spaces. By shifting your approach to a natural, homemade alternative, you can cultivate a beautiful, weed-free landscape while keeping your soil, family, and local pollinators completely safe.
3 Easy Homemade DIY Weed Killer Recipes That Work Fast

Why Switching to Eco-Friendly Weed Control Matters
For decades, standard chemical weed killers were the default choice for quick landscaping fixes. However, a growing body of research has highlighted the steep environmental and health costs of these synthetic options. Many conventional herbicides rely on glyphosate, a powerful chemical agent that has raised significant health and environmental concerns.
When you spray these aggressive chemicals around your home, the consequences extend far beyond the target weeds:
Pollinator Decline: Chemical residues can directly harm vital beneficial insects, such as honeybees, butterflies, and predatory beetles that keep other garden pests in check.
Soil Degradation: Harsh synthetic compounds can disrupt the fragile microbiome of your soil, killing off beneficial fungi and bacteria that your prized plants need to thrive.
Groundwater Contamination: Rainwater can easily wash chemical herbicides off hardscapes, allowing them to leach deep into local groundwater tables and nearby waterways.

Embracing an all-natural weed killer allows you to break this toxic cycle. These homemade mixtures use basic, budget-friendly pantry staples to eradicate unwanted vegetation efficiently without leaving a lasting toxic footprint in your backyard ecosystem.
The Magic Trio: Vinegar, Salt, and Soap
The most reliable and effective homemade weed killer relies on a simple scientific reaction driven by three everyday household ingredients: white vinegar, salt, and liquid dish soap. Rather than poisoning the plant from the inside out with synthetic toxins, this contact-based solution physically strips away the weed’s protective defenses.
How the Ingredients Work Together
The vinegar acts as the primary driving force; its acetic acid content immediately attacks the protective waxy cuticle layer on a weed’s foliage. This causes the plant to rapidly lose moisture. When combined with salt, the mixture accelerates dehydration, drawing moisture completely out of the plant’s cellular structure and preventing it from absorbing vital nutrients. Finally, the liquid dish soap serves as a surfactant or “sticker.” Without soap, the watery solution would simply bead up and roll right off the slick leaves. The soap breaks the surface tension, ensuring the mixture clings securely to the foliage long enough to do its job.
The Ultimate DIY Weed Killer Recipe
Creating this powerful natural herbicide takes less than five minutes and costs only a fraction of what you would pay for a commercial chemical brand.
What You Will Need:
1 gallon of white vinegar: Standard 5% acidity household vinegar works well for young weeds, but 20% concentrated horticultural vinegar delivers maximum strength for tougher infestations.
2 cups of Epsom salts: Epsom salt is rich in magnesium and breaks down excellently, though standard table salt can be substituted in a pinch.
1/4 cup of non-toxic liquid dish soap: Any basic dish soap will work to give the mixture its necessary gripping power.
A clean bucket and a heavy-duty garden pump sprayer.
Step-by-Step Mixing Instructions:
Pour the Base: Empty the entire gallon of white vinegar into a large bucket.
Dissolve the Crystals: Add the two cups of Epsom salts or table salt to the liquid. Stir the mixture thoroughly for a minute or two until the salt crystals are entirely dissolved at the bottom.
Incorporate the Surfactant: Gently pour in the quarter-cup of dish soap. Stir slowly to combine the ingredients without creating an excessive amount of bubbly foam.
Fill Your Sprayer: Carefully funnel the finished solution into a handheld spray bottle or a dedicated garden pump sprayer for a smooth, even application.
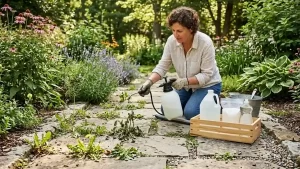
Application Tactics for Complete Eradication
To get the absolute best results from your homemade spray, you need to apply it with tactical precision.
Timing is Everything
Always check your local weather forecast before spraying. You want to choose a warm, bright, sunny day with absolutely zero rain predicted for at least 24 hours. Direct sunlight acts as a powerful catalyst for this recipe. The intense heat of the sun accelerates the drying process, baking the vinegar and salt mixture directly into the targeted leaves.
Target with Precision
Adjust the nozzle of your sprayer to a direct, localized stream rather than a wide, drifting mist. Spray the mixture directly onto the leaves of the weeds until they are completely saturated. It is vital to remember that this natural formula is entirely non-selective—it cannot tell the difference between a pesky dandelion and your favorite prized perennial flowers. If you accidentally spray a non-target garden plant, rinse the foliage immediately with clean water to neutralize the acid.
Focus on Vulnerable Growth
This contact spray is most effective when used against young, freshly sprouted weeds. Newly emerged weeds have thin cellular walls and lack deep, established root systems, making them highly susceptible to rapid dehydration. Within just a few hours of application, you will notice the sprayed weeds beginning to wilt and darken. By the following day, they should be completely crispy, brown, and dead.
Ideal Locations for Using Natural Sprays
Because this mixture introduces salt into the environment, it should be used strategically. Salt can accumulate in the dirt over time, making it difficult for future plants to grow in that exact spot. Therefore, this spray is best reserved for areas where you want permanent vegetation control:
Cracks in concrete driveways and asphalt paths
Gaps between brick pavers, flagstones, or patio tiles
Gravel walkways, fire pit zones, and rock gardens
The open spaces between vegetable garden rows (applied carefully at ground level)
While it works beautifully on annual weeds, deeply rooted perennial pests like mature dandelions or Canada thistle may occasionally send up new shoots from their deep taproots a few weeks later. If you are dealing with stubborn, established perennials, simply reapply the spray a second time to starve the root system and kill off the new top growth completely.
A Holistic Approach: Additional Preventative Defenses
While a bottle of homemade vinegar spray is your best weapon for clearing active weed outbreaks, the ultimate goal is to stop weed seeds from germinating in the first place. Integrating a few preventative, natural habits into your routine will keep your property pristine with minimal effort.
Deploy Thick Mulch Barriers
One of the easiest ways to prevent weeds is to starve them of sunlight. Spreading a thick, three-to-four-inch layer of organic mulch—such as shredded wood chips, clean straw, or decomposed leaves—creates a physical shield over your topsoil. This barrier completely blocks light from reaching buried weed seeds, stopping them from sprouting while simultaneously conserving moisture for your desired plants.
The Boiling Water Technique
For clearing out small cracks along sidewalks or stone steps, look no further than your kitchen kettle. Pouring boiling water directly over a weed is an instant, cost-free thermal eradication method. The intense heat cooks the plant’s cell walls instantly, making it an excellent option for tight spaces where you want to avoid spraying altogether.
Smart Hand-Pulling Habits
When manual pulling is required, timing makes all the difference. Avoid pulling weeds when the soil is baked hard and dry, as the stems will simply snap off, leaving the roots intact to grow back. Instead, head out to the garden shortly after a heavy rainstorm. Moist soil loosens its grip on root systems, allowing you to easily pull out the entire weed, taproot and all, with minimal resistance.
Apply Corn Gluten Meal
If you want a natural pre-emergent solution, consider spreading corn gluten meal over your garden beds in the early spring. This organic byproduct of corn processing prevents newly shed weed seeds from successfully forming roots after they germinate, stopping an infestation before it ever breaks through the surface of your soil.
Conclusion
Achieving a pristine, beautiful yard does not require making compromises that harm local wildlife or introduce synthetic chemicals to your property. By turning to simple, cost-effective pantry staples like vinegar, salt, and non-toxic dish soap, you can easily create a fast-acting contact weed killer that rivals commercial alternatives. Pair this powerful spray with smart preventative habits like mulching and hot-water treatments, and you will enjoy a vibrant, healthy, and weed-free outdoor oasis all year long.
Frequently Asked Questions
Will this vinegar spray ruin the quality of my garden soil permanently?
If you use the spray occasionally to spot-treat individual weeds, it will not cause lasting damage to your soil. The acetic acid in the vinegar breaks down rapidly in the environment. However, because the mixture contains salt, repeated heavy drenching in the exact same spot can lead to a localized buildup of sodium, which can prevent future plants from growing there. Keep your applications focused primarily on the leaves rather than soaking the ground.
Can I use regular 5% apple cider vinegar instead of white vinegar?
Yes, apple cider vinegar will work because it still contains acetic acid, but standard clear white distilled vinegar is generally preferred. White vinegar is cheaper to buy in bulk quantities and typically has a slightly cleaner application without any natural fruit sugars that might accidentally attract ants or sweet-loving insects to the area.
Is this homemade weed killer safe to use around outdoor pets?
Yes, once the sprayed solution has dried completely on the leaves, it is safe for dogs and cats to walk through the area. Unlike chemical options that carry strict warnings about keeping pets off the grass for days, this recipe relies on food-grade ingredients. However, to be completely safe, keep your pets indoors while you are actively spraying to avoid getting the acidic mixture in their eyes or on their paws.
How long does it take for the weeds to die after spraying them?
On a hot, clear day with plenty of direct sunlight, you will typically see the leaves begin to wilt, sag, and change color within two to four hours. Within 24 to 48 hours, the plant structure should be entirely dried out, brown, and ready to be raked away.
Can I use this mixture to eliminate weeds growing in my lawn?
It is not recommended to use this spray over large areas of a grass lawn. Because this formula is non-selective, it will kill your lawn grass just as easily as it kills dandelions or crabgrass. For lawn weeds, it is best to pull them by hand when the soil is wet or to carefully spot-treat the center of the weed using a precise paintbrush dipped in the solution to avoid touching the surrounding blades of grass.