Table of Contents
- 1. 1. Master Seasonal Timing
- 1.1. Cool Climates vs. Warm Zones
- 1.2. The Magic of the First Frost
- 2. 2. Maximize Daily Sunlight
- 3. 3. Build Heavily Fertilized Soil
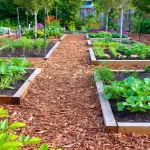
- 3.1. Preparing the Bed
- 3.2. A Layered Feeding Schedule
- 4. 4. Maintain Flawless Moisture Consistency
- 5. 5. Force Growth by Topping the Stalks
- 6. 6. Harvest Strategically from the Bottom Up
- 7. 7. Leverage Late-Season Frosts
- 8. 8. Establish Early Pest Defenses
- 9. 9. Overwinter and Save the Stalks
- 10. Conclusion
- 11. Frequently Asked Questions
- 11.1. Why are my Brussels sprouts loose, leafy, and open instead of tight little heads?
- 11.2. When exactly should I chop off the top of my Brussels sprout plants?
- 11.3. Do I need to remove the large lower leaves as the plant grows?
- 11.4. Can Brussels sprouts survive a hard freeze in the winter?
- 11.5. My sprouts are covered in tiny gray bugs. What are they and how do I get rid of them?
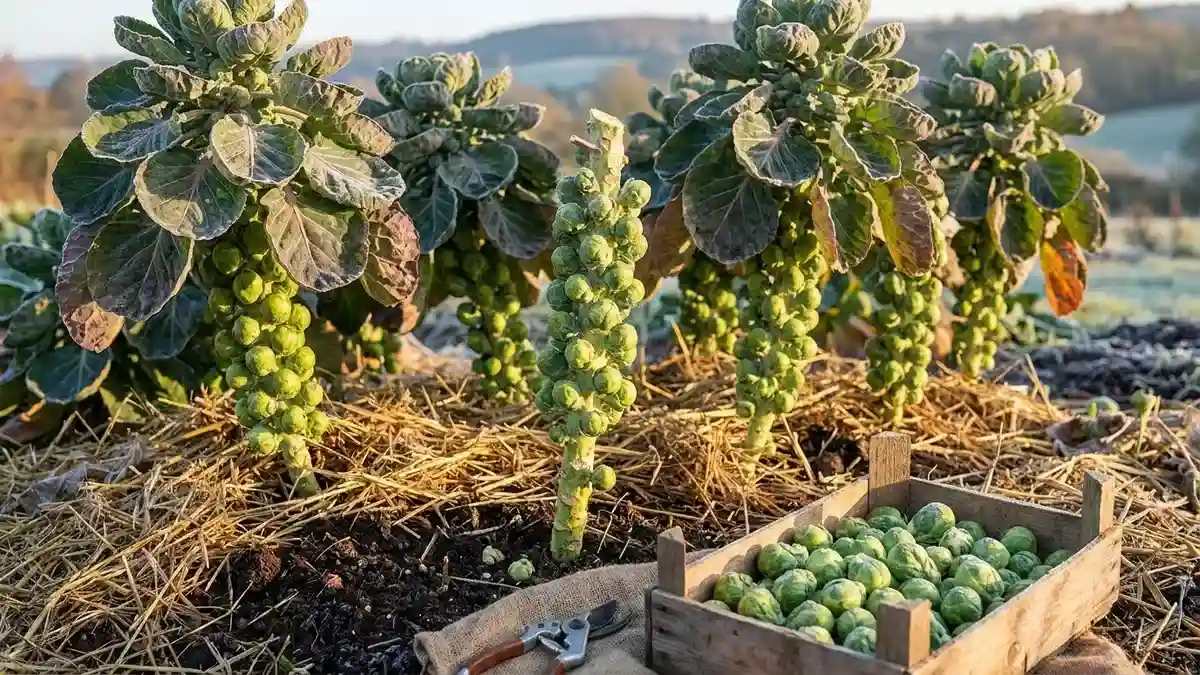
9 Secrets to Growing Your Biggest Brussels Sprouts Harvest Ever
Brussels sprouts are the ultimate redemption veggie. While many of us grew up dreading those mushy, bitter boiled greens served at the childhood dinner table, a culinary renaissance has firmly brought them back into style. When roasted to perfection with a bit of olive oil until the edges turn caramelized, crispy, and sweet, they easily become the star of any dinner plate.
However, if you have ever tried growing these miniature cabbages yourself, you know they are not a crop for the impatient. Brussels sprouts require a long commitment, taking anywhere from 80 to 100 days from the day you transplant them into the ground until they are ready for the kitchen. Because they occupy garden real estate for so long, you want to make sure your efforts pay off.
To turn spindly, bare stalks into robust pillars completely crowded with tight, firm buds, you need to understand their unique seasonal needs. Let’s dive into nine proven strategies to maximize your backyard yield and enjoy an abundant harvest of homegrown sprouts.

9 Secrets to Growing Your Biggest Brussels Sprouts Harvest Ever
1. Master Seasonal Timing
Success with Brussels sprouts is entirely dependent on the calendar. Because these plants take their sweet time to mature, timing your planting window correctly makes the difference between open, bitter leafy buds and sweet, tightly furled heads.
Cool Climates vs. Warm Zones
The general rule of thumb is that your sprouts need to mature when the weather is consistently cool.
In northern or cooler regions: Start your seeds indoors during late winter or the very first weeks of spring. Once the threat of hard spring frosts has passed, move your hardened seedlings out into the garden.
Also Read Baking Soda Overuse Damages Houseplants
In southern or warmer climates: These plants struggle in intense summer heat. Instead, treat them as a fall or winter crop. Start your seeds midsummer so that the plants grow during the tail end of the heat but do their crucial bud development during the chilly autumn months.
The Magic of the First Frost
Why is cool weather so vital? When Brussels sprouts mature in high temperatures, the buds grow quickly but remain loose, small, and unappealingly bitter. Conversely, chilly autumn air slows down growth and triggers a natural defense mechanism within the plant: it converts its internal starches into natural sugars. Allowing your plants to experience a couple of light autumn frosts results in exceptionally sweet, nutty sprouts that easily outshine anything you can buy at a standard grocery store.
2. Maximize Daily Sunlight
Brussels sprouts are incredibly sun-hungry. While leafy greens like spinach or lettuce can tolerate dappled shade, these massive stalks need significant energy to develop dozens of dense, heavy buds.
When choosing a spot in your garden layout, aim for a location that receives a minimum of six hours of direct sunlight daily. However, if you want truly spectacular yields and sturdier stalks that won’t topple over, aim for eight to ten hours of unobstructed light. Think of sunlight as the primary fuel source for your plants; a shaded sprout might survive, but its stalk will be legally bare, leaving you disappointed at harvest time.
3. Build Heavily Fertilized Soil
If lettuce is a light snacker, Brussels sprouts are the heavy lifters of the vegetable world. They demand significantly more nutrients than beans, peas, or greens, and they will quickly exhaust poor soil.
Preparing the Bed
Before your seedlings ever touch the garden soil, you need to build a rich foundation. Work a generous 2- to 3-inch layer of rich compost or well-rotted animal manure into the top several inches of your planting bed. This improves soil structure and provides a slow-release bank of essential micronutrients.
A Layered Feeding Schedule
Because their nutritional needs evolve as they grow, a single application of fertilizer at planting time won’t cut it. Follow this targeted feeding strategy throughout the season:
| Growth Stage | Ideal Nutrient Focus | Purpose |
| Early Season | High Nitrogen | Pushes rapid leafy growth and builds a tall, thick main stalk. |
| Mid-Season | Balanced (e.g., 10-10-10) | Keeps overall plant development steady and uniform. |
| Late Summer / Bud Formation | High Phosphorus & Potassium | Promotes firm, tightly packed buds and bulks up sprout size. |
Without a reliable, steady stream of nutrition, the plant cannot support both its massive canopy of leaves and a full stalk of vegetables, resulting in loose, airy buds that never quite mature.
4. Maintain Flawless Moisture Consistency
When it comes to watering, Brussels sprouts hate drama. They require a steady, predictable supply of moisture—roughly 1 to 1.5 inches of water per week, depending on your local temperature and soil type.
If your watering routine swings wildly between bone-dry droughts and sudden, heavy drenchings, the plant experiences severe stress. This fluctuating moisture causes the developing buds to grow unevenly, often forcing them to open up like tiny, loose cabbages rather than forming tight, solid heads.
To combat this, apply a thick layer of organic mulch around the base of your plants. Utilizing straw, shredded leaves, or clean wood chips does triple duty: it locks moisture into the soil, dampens drastic soil temperature swings, and smothers competing weeds. This keeps your plants stress-free so they can focus entirely on production.
5. Force Growth by Topping the Stalks
This is one of the best-kept secrets of experienced market gardeners, yet it is frequently overlooked by backyard beginners. Left to their own devices, Brussels sprouts will simply keep growing upward, continuously producing new leaves at the top while the lower sprouts slowly develop.
[Normal Growth: Energy moves up to new leaves]
                       ↓
[Topping: Cut off the growing tip in late summer]
                       ↓
[Redirected Growth: Energy moves outward to swell existing sprouts]
To maximize your yield size, wait until late summer or early autumn when the plant is roughly 28 to 30 inches tall and you can see the tiny sprouts beginning to form along the lower half of the stem. Take a sharp pair of pruners and cleanly snip off the very top growing tip of the main stalk. By removing this terminal bud, you signal to the plant that its vertical growth is finished. It will instantly redirect all its energy away from making new leaves and pour it directly into plumping up the existing sprouts, resulting in a dramatic increase in head size and firmness within just a few weeks.
6. Harvest Strategically from the Bottom Up
When it comes time to enjoy the fruits of your labor, do not clear-cut your patch all at once. Brussels sprouts mature progressively, starting from the very bottom of the stalk and slowly ripening upward toward the top canopy.
Keep a close eye on the lowest buds. Once they reach about 1 to 2 inches in diameter and feel firmly packed when squeezed, they are ready for the kitchen. You can easily remove them by snapping them downward with a quick twist, or you can cut them cleanly away with a sharp pocketknife.
By systematically harvesting the mature lower sprouts every week, you continuously lighten the load on the plant. This encourages it to channel its remaining resources into the younger, developing buds higher up the stem, significantly lengthening your overall harvest window.
7. Leverage Late-Season Frosts
While early autumn freezes signal the end of the line for tomatoes and peppers, they are exactly what your Brussels sprouts have been waiting for. Do not rush out to harvest your entire crop just because the local weather forecast warns of a dip below freezing.
As the nights turn icy, the starch molecules within the sprouts break down into simpler glucose sugars. This natural frost-proofing process dramatically mellows the vegetable’s flavor, stripping away any harsh, sulfuric bitterness and replacing it with a complex, sweet, and nutty profile.
Depending on your local winter climate, you can easily leave these hardy giants standing right out in the frozen garden well into early winter. Simply trek out to the garden patch and pick them fresh off the stem as you need them for holiday dinners.
8. Establish Early Pest Defenses
Because Brussels sprouts belong to the brassica family, they share the same persistent pests that plague broccoli, kale, and cabbage. If left unprotected, an army of cabbage worms, flea beetles, or hidden aphids can completely skeletonize your plants before the sprouts even have a chance to form.
The key to saving your crop is early, proactive intervention:
Deploy Floating Row Covers: Cover your young transplants with a lightweight mesh fabric immediately after planting. This creates a physical barrier that prevents moths from laying eggs on the leaves.
Inspect Regularly: Flip the large leaves over every few days to check for hidden clusters of yellow eggs or tiny, bright green caterpillars.
Use Targeted Organic Controls: If you notice chewing damage, hand-pick the visible pests. For larger infestations, apply safe, natural treatments like Bacillus thuringiensis (BT)—a naturally occurring soil bacterium that targets caterpillars without harming beneficial pollinators—or organic neem oil.
9. Overwinter and Save the Stalks
When winter finally tightens its grip and a truly deep, ground-freezing freeze threatens to damage your remaining plants, it is time for the final harvest. Instead of picking individual sprouts in the freezing cold, chop down the entire main stem at ground level.
Trim away any remaining large, fan-like leaves, but leave the sprouts firmly attached to the central stalk. Bring the entire pillar indoors and store it upright in a cool, dark, and humid location, such as an unheated basement, root cellar, or attached garage.
The thick, fibrous stalk acts as a natural storage unit, holding moisture and nutrients. Over the next several weeks, the smaller, immature sprouts at the top of the stalk will continue to slowly swell and ripen. You can keep the stalks on hand for a month or more, snapping off fresh, crisp sprouts whenever you are ready to cook.
Conclusion
Mastering the art of growing Brussels sprouts is an incredibly fulfilling journey for any home gardener. While it certainly demands more patience, water, and fertilizer than your average backyard crop, the ultimate payoff is unmatched. By timing your planting for a cool autumn finish, topping the stalks to boost bud size, and allowing the winter frost to naturally sweeten the harvest, you will transform a few humble seedlings into a magnificent, cold-hardy bounty. Skip the grocery store options this winter and fill your table with sweet, crispy, homegrown sprouts that completely redefine what this vegetable can be.
Frequently Asked Questions
Why are my Brussels sprouts loose, leafy, and open instead of tight little heads?
Loose or leafy sprouts are almost always caused by heat stress or improper timing. If the buds try to mature during the hot days of midsummer, they grow too quickly and spread open like miniature kale plants. To fix this, adjust your planting calendar so that the buds form during the cool, crisp days of autumn.
When exactly should I chop off the top of my Brussels sprout plants?
You should “top” your plants in late summer or early fall, roughly 3 to 4 weeks before your region’s expected first fall frost. Look for a plant height of around 28 to 30 inches and ensure that visible tiny green buds have already started forming along the lower portion of the central stem.
Do I need to remove the large lower leaves as the plant grows?
While not strictly mandatory, many successful gardeners gradually snap off the lower leaves as the sprouts beneath them begin to grow. Removing these older leaves improves air circulation around the stem—which deters pests like aphids—and makes it much easier to access the mature sprouts when it is time to harvest.
Can Brussels sprouts survive a hard freeze in the winter?
Yes, they are incredibly cold-tolerant. Mature plants can easily withstand temperatures dropping down into the mid-20s Fahrenheit. While a severe, prolonged freeze below 20°F may eventually damage the outer leaves, a light blanket of snow or a brief frost will only make the sprouts taste sweeter.
My sprouts are covered in tiny gray bugs. What are they and how do I get rid of them?
Those are likely cabbage aphids, a very common pest that loves to hide in the tight crevices of brassica crops. You can blast them off the stems with a strong stream of water from your garden hose, or treat the affected areas thoroughly with an organic insecticidal soap or neem oil spray, making sure to get underneath the leaves.